Toyota RAV4 Lug Nut Torque: 1996–2026 Chart
Correct wheel-nut torque keeps a Toyota RAV4 wheel seated evenly against the hub without placing excessive stress on the studs or threads. Using an impact wrench alone, lubricating the studs or confusing ft-lb with N·m can produce an unsafe installation.
This guide covers the Toyota RAV4 lug nut torque by year, along with the common thread and socket sizes, correct tightening pattern and factory-versus-aftermarket wheel requirements.
Quick Answer
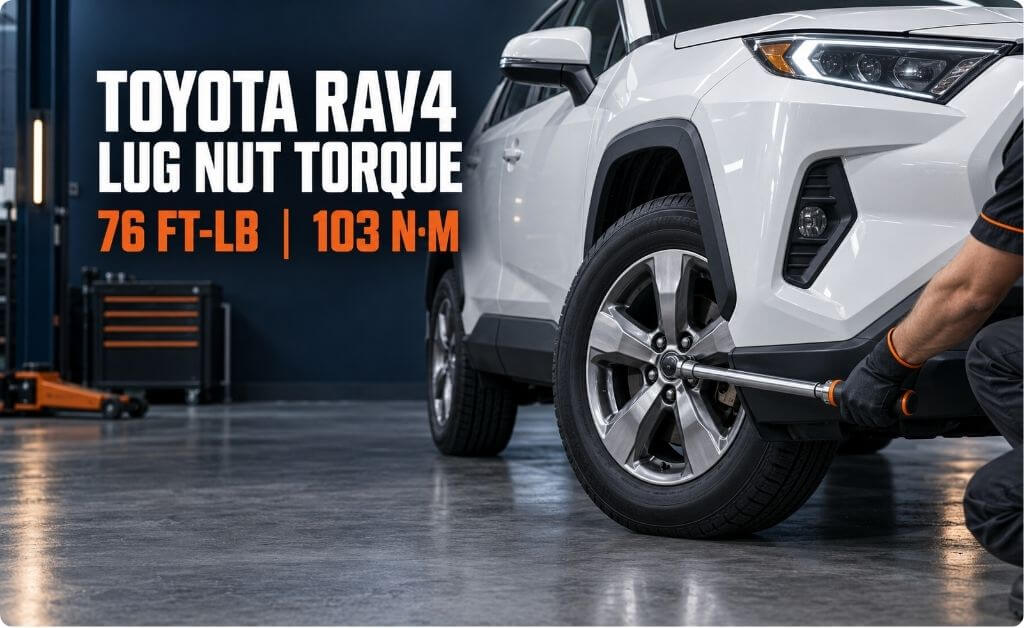
The Toyota RAV4 lug nut torque is 76 ft-lb (103 N·m or 10.5 kgf·m) for North American models equipped with compatible factory wheels.
Start all five lug nuts by hand. Complete the final tightening with a calibrated torque wrench, following a crisscross or star pattern.
If your RAV4 has aftermarket wheels or replacement wheel hardware, follow the wheel or hardware manufacturer’s specification when it differs from Toyota’s factory value.
Toyota RAV4 Lug Nut Torque Chart
| Model years | Generation | RAV4 versions | Lug nut torque |
| 1996–2000 | XA10 | Gas | 76 ft-lb (103 N·m) |
| 2001–2005 | XA20 | Gas | 76 ft-lb (103 N·m) |
| 2006–2012 | XA30 | 4-cylinder and V6 | 76 ft-lb (103 N·m) |
| 2013–2015 | XA40 | Gas | 76 ft-lb (103 N·m) |
| 2016–2018 | XA40 | Gas and Hybrid | 76 ft-lb (103 N·m) |
| 2019–2020 | XA50 | Gas and Hybrid | 76 ft-lb (103 N·m) |
| 2021–2024 | XA50 | Gas, Hybrid and Prime | 76 ft-lb (103 N·m) |
| 2025 | XA50 | Gas, Hybrid and Plug-in Hybrid | 76 ft-lb (103 N·m) |
| 2026 | XA60 | Hybrid and Plug-in Hybrid | 76 ft-lb (103 N·m) |
First-generation fitment references indicate the same specification. Because market-specific equipment can differ, confirm it against the manual supplied with an early RAV4.
The 2026 RAV4 starts the XA60 generation. The 2026 Plug-in Hybrid manual specifies 103 N·m; owners should still confirm the value in the manual supplied with their exact vehicle, especially outside North America.
Important
This chart is intended for original or compatible factory-style wheels and wheel nuts. Different markets, aftermarket wheels, wheel spacers or replacement studs may have separate hardware and torque requirements.
When another specification is provided for the exact wheel installation, follow the vehicle, wheel or hardware manufacturer’s instructions.
RAV4 Wheel Fastener Specifications
Most North American RAV4 factory applications use the following wheel hardware:
| Specification | Common factory value |
| Wheel-nut torque | 76 ft-lb |
| Metric torque | 103 N·m |
| Alternative unit | 10.5 kgf·m |
| Stud thread | M12 × 1.5 |
| Bolt pattern | 5 × 114.3 mm |
| Fasteners per wheel | 5 lug nuts |
| Common OEM lug-nut hex | 21 mm |
| Tightening pattern | Five-lug star pattern |
| Final tightening tool | Calibrated torque wrench |
The M12 × 1.5 measurement describes the stud diameter and thread pitch. It does not identify the required socket or the shape of the lug-nut seat.
Many original RAV4 lug nuts accept a 21 mm socket, but replacement hardware may use a different hex size. Check the lug nuts actually installed before selecting a socket.
Is the Torque Different for Gas, Hybrid or RAV4 Prime Models?
Toyota has used the same factory wheel-nut torque across the major North American RAV4 powertrains:
- Gas models
- Earlier V6 models
- RAV4 Hybrid
- RAV4 Prime
- RAV4 Plug-in Hybrid
- Front-wheel-drive models
- All-wheel-drive models
Vehicle weight, engine output and drivetrain do not independently determine the wheel-nut specification. The required torque is based on the complete wheel, stud and lug-nut assembly.
Factory wheel diameter also does not automatically change the specification. Toyota manuals list the same value across several original 16-, 17-, 18- and 19-inch wheel configurations.
How to Torque Toyota RAV4 Lug Nuts Correctly
Park on a firm, level surface and apply the parking brake. Follow the applicable RAV4 owner’s manual for jacking points, wheel removal and safe use of the emergency jack.
Never place any part of your body beneath a vehicle supported only by an emergency jack.
1. Inspect the Wheel and Fasteners
Check the wheel studs, lug-nut threads, wheel holes and mounting surfaces.
Do not reuse hardware with:
- Cracked or deformed threads
- Cross-threading
- Severe corrosion
- Stretched or damaged studs
- Deformed bearing surfaces
Damaged hardware should be replaced before the vehicle is driven.
2. Clean the Threads and Mounting Surfaces
Remove dirt, loose rust and debris from the hub and wheel-mounting surfaces. Material trapped between the wheel and hub can prevent the wheel from seating evenly.
The studs and lug nuts should be clean and dry. Do not apply oil, grease, anti-seize or thread locker unless Toyota or the installed wheel manufacturer specifically instructs you to do so.
Lubrication changes thread friction and may create more clamping force than intended at the same torque-wrench setting.
3. Position the Wheel Against the Hub
Place the wheel squarely against the hub. Make sure it sits flush rather than being held at an angle by corrosion, dirt or an incorrectly positioned component.
4. Start Every Lug Nut by Hand
Thread all five lug nuts by hand for several complete turns.
Each one should rotate smoothly. If a nut immediately binds or becomes unusually difficult to turn, stop and inspect the threads. Do not force a suspected cross-threaded nut with a wrench or impact tool.
5. Snug the Nuts in a Star Pattern
Lightly snug each lug nut using the five-lug crisscross sequence. Do not fully tighten one nut while the others remain loose.
This initial pass pulls the wheel evenly toward the hub.
6. Lower the RAV4 Completely
Following the owner’s manual, lower the vehicle completely onto a firm, level surface before applying final torque.
Remove the jack once the vehicle is stable.
7. Set the Torque Wrench
Set a calibrated torque wrench to:
76 ft-lb or 103 N·m
Check the selected unit carefully. 76 N·m is not equal to 76 ft-lb. A setting of 76 N·m is only about 56 ft-lb and would be below the specified torque.
8. Complete the Final Torque Pass
Apply smooth pressure to each lug nut in the star sequence.
With a click-type torque wrench, stop at the first clear click. Do not intentionally pull through multiple clicks on the same nut.
After completing the first sequence, check all five nuts again in the same order. Toyota manuals may describe tightening each nut two or three times in the illustrated sequence. This means checking the complete pattern in controlled passes—not repeatedly adding force after a nut has reached the target setting.
Toyota RAV4 Lug Nut Tightening Pattern
Using the uppermost lug as position 1 and numbering the remaining positions clockwise, follow this sequence:
1 → 3 → 5 → 2 → 4
| Step | Lug position | Direction |
| 1 | 1 | Begin at the top |
| 2 | 3 | Move across the wheel |
| 3 | 5 | Skip the adjacent lug |
| 4 | 2 | Continue across |
| 5 | 4 | Finish the star |
Use this pattern during both the initial snugging and final torque passes.
Avoid tightening the lug nuts consecutively around the wheel in a circle. Doing so can pull one side into position before the opposite side is seated evenly.
Factory Wheels vs Aftermarket Wheels
The Toyota factory specification should not automatically be applied to every aftermarket wheel.
An aftermarket wheel may fit the RAV4’s bolt pattern and studs but still require a different:
- Lug-nut seat
- Shank length
- Bearing surface
- Outside diameter
- Hex size
- Installation procedure
- Torque specification
A nut marked M12 × 1.5 may thread onto the RAV4 stud but still be incompatible with the wheel. Thread fit alone does not confirm that the seat shape and other dimensions are correct.
Use the following order when determining the specification:
- Check the instructions supplied with the aftermarket wheel.
- Confirm the required lug-nut or wheel-hardware design.
- Follow any vehicle-specific torque provided by the wheel manufacturer.
- Use Toyota’s factory value only when the wheel manufacturer confirms that it applies.
- Contact the manufacturer or a qualified installer if the documentation is unclear.
Wheel diameter alone should not be used to select a torque value.
Too Tight, Too Loose or Uneven: Why Torque Matters
| Condition | Possible consequences |
| Too loose | Wheel movement, damaged studs or wheel holes, vibration and progressive loosening |
| Too tight | Stretched studs, damaged threads or seats, broken hardware and difficult roadside removal |
| Uneven torque | Uneven seating and inconsistent clamping across the wheel |
More torque does not make the wheel safer. It may overload the studs or damage the mating surfaces.
Likewise, tightening the nuts only by feel does not confirm sufficient clamping force. A calibrated torque wrench provides a controlled, repeatable final setting.
If a wheel has already been heavily over-tightened, simply loosening and resetting the nuts may not correct existing stud or thread damage. Inspect the hardware before driving.
When Should You Check the Lug Nut Torque?
Check the wheel-nut torque whenever a wheel has been removed or disturbed, including after:
- Installing new tires
- Rotating the tires
- Brake or suspension work involving wheel removal
- Installing seasonal wheels
- Replacing a wheel stud or lug nut
- Fitting the spare wheel
- Correcting an improperly installed wheel
Some wheel or tire manufacturers also require a post-installation torque check after a stated driving distance. Follow the applicable vehicle manual and the instructions supplied with the installed wheels or hardware.
If a lug nut turns significantly during a later check, inspect the wheel, stud, nut and mounting surfaces rather than repeatedly tightening it without identifying the cause.
Common RAV4 Lug Nut Torque Mistakes
Using an Impact Wrench for Final Tightening
An impact wrench cannot reliably establish the precise final torque. Tool power, air pressure, battery condition and impact time can all affect the result.
An impact tool may be used carefully for removal or initial snugging, but complete the final pass with a torque wrench.
Lubricating the Studs
Oil, grease and anti-seize alter thread friction. Unless specifically required by the applicable manufacturer, apply the factory specification to clean, dry threads.
Tightening Around the Wheel in a Circle
Tightening adjacent nuts one after another can seat the wheel unevenly. Use the five-lug star pattern.
Repeatedly Clicking the Torque Wrench
Stop at the wrench’s first clear target indication. Repeated clicks can add unnecessary torque.
Confusing ft-lb With N·m
Use either 76 ft-lb or 103 N·m. Do not set a metric wrench to 76 N·m.
Using the Wrong Lug-Nut Seat
A correct thread does not guarantee a correct wheel fit. The seat, shank and bearing surface must match the wheel.
Forcing a Cross-Threaded Lug Nut
A nut that will not turn smoothly by hand may have damaged or misaligned threads. Remove and inspect it instead of forcing it with an impact tool.
Related Topic: Toyota RAV4 Tire Size
Frequently Asked Questions
What is the Toyota RAV4 lug nut torque?
The factory wheel-nut torque for North American Toyota RAV4 models is 76 ft-lb (103 N·m or 10.5 kgf·m).
What size socket fits Toyota RAV4 lug nuts?
Many original RAV4 lug nuts use a 21 mm socket. Aftermarket or replacement lug nuts may require a different size.
What is the RAV4 lug-nut thread size?
The common factory stud thread is M12 × 1.5. Confirm replacement hardware by application because the thread, seat and dimensions must all match.
Is the RAV4 Hybrid lug nut torque different?
No. Factory-equipped RAV4 Hybrid models use the same wheel-nut specification as corresponding gas models.
What is the RAV4 Prime lug nut torque?
RAV4 Prime and RAV4 Plug-in Hybrid models use 76 ft-lb (103 N·m) with compatible factory wheels.
Does the RAV4 spare wheel use the same torque?
Toyota wheel-changing instructions specify the same tightening torque when installing the supplied spare on applicable models. Check the manual for your exact year and spare-wheel configuration.
Can I use an impact wrench on RAV4 lug nuts?
Use an impact wrench only for removal or careful initial snugging. Set the final torque with a calibrated torque wrench.
Final Takeaway
Toyota RAV4 models with compatible factory wheels use a lug nut torque of:
76 ft-lb = 103 N·m = 10.5 kgf·m
Install every lug nut by hand, keep the threads clean and dry, and complete the final tightening in a five-lug star pattern with a calibrated torque wrench.
For aftermarket wheels, replacement studs or non-original lug nuts, follow the wheel or hardware manufacturer’s instructions when they differ from Toyota’s factory specification.
