Mountain Bike Tire Pressure: Chart by Weight and Setup
The right mountain bike tire pressure depends on your weight, tire size, casing and riding conditions. Your tires need enough support for impacts and corners while remaining flexible enough to absorb uneven ground.
The chart below provides front and rear starting estimates for defined XC, trail, enduro and downhill setups. Check the reference assumptions, follow your equipment’s pressure limits, and fine-tune the pressure on familiar terrain.
Quick Answer
For a 160 lb rider including riding gear, our trail reference profile gives 18 PSI front / 20 PSI rear with tubeless tires, or 20 PSI front / 22 PSI rear with tubes. These calculator estimates assume 29 × 2.4-inch tires, a Medium casing setting and a 32 lb bike. Your tire and rim manufacturer’s applicable pressure limits take priority.
Mountain Bike Tire Pressure Chart by Rider Weight
This chart shows rounded calculator estimates for four reference setups. Use a profile when its assumptions reasonably match your equipment and riding conditions.
Every pair reads front / rear PSI. The weight column includes the rider and riding gear; the assumed bike weight is added separately.
Before using a value: Follow the manufacturer’s current pressure guidance for your exact tire, rim and tube or tubeless setup. A chart estimate outside the applicable limits must not be used.
| Rider Weight Including Gear | XC Tube | XC Tubeless | Trail Tube | Trail Tubeless | Enduro Tube | Enduro Tubeless | Downhill Tube | Downhill Tubeless |
| 100 lb / 45 kg | 17 / 19 | 15 / 17 | 17 / 18 | 15 / 17 | 20 / 22 | 18 / 20 | 20 / 22 | 18 / 20 |
| 120 lb / 54 kg | 18 / 20 | 17 / 18 | 18 / 20 | 16 / 18 | 21 / 24 | 19 / 21 | 21 / 23 | 19 / 21 |
| 140 lb / 64 kg | 19 / 21 | 18 / 20 | 19 / 21 | 17 / 19 | 22 / 25 | 20 / 23 | 22 / 25 | 20 / 22 |
| 160 lb / 73 kg | 21 / 23 | 19 / 21 | 20 / 22 | 18 / 20 | 24 / 26 | 21 / 24 | 23 / 26 | 21 / 23 |
| 180 lb / 82 kg | 22 / 24 | 20 / 22 | 21 / 24 | 19 / 21 | 25 / 28 | 23 / 25 | 24 / 27 | 22 / 25 |
| 200 lb / 91 kg | 23 / 26 | 21 / 23 | 22 / 25 | 20 / 23 | 26 / 29 | 24 / 26 | 26 / 28 | 23 / 26 |
| 220 lb / 100 kg | 24 / 27 | 22 / 25 | 24 / 26 | 21 / 24 | 27 / 31 | 25 / 28 | 27 / 30 | 24 / 27 |
Pressures are rounded to the nearest whole PSI, with half values rounded upward. Calculations used the pound values; kilogram equivalents are rounded.
Reference Setups Behind the Chart
All four profiles use 29-inch wheels front and rear, tires labelled 2.4 inches wide, and no inserts. Inflation and riding temperatures were both set to 70°F, approximately 21°C.
| Reference Profile | Assumed Bike Weight | Calculator Casing Option | Calculator Riding-Condition Option |
| XC | 26 lb / 11.8 kg | Thin | 2: XC/Trail Medium |
| Trail | 32 lb / 14.5 kg | Medium | 2: XC/Trail Medium |
| Enduro | 36 lb / 16.3 kg | Medium | 3: Enduro/Steep/Rocks |
| Downhill | 40 lb / 18.1 kg | Thick | 3: Enduro/Steep/Rocks |
The bike weights and category mappings are editorial assumptions. Your actual bike may differ, and a riding-category name alone does not identify its tire casing.
The XC profile uses a very lightweight Thin casing. Protected XC tires may fit the calculator’s Medium category better. The Enduro profile uses Medium because the calculator does not offer a dedicated Enduro casing option.
The Downhill column represents a Thick casing on steep, rocky terrain. It is not a dedicated large-jump or race-pressure recommendation.
Calculation Method and Limitations
We collected the estimates from the official Wolf Tooth Tire Pressure Calculator. Each rider-and-gear weight was added to the profile’s assumed bike weight to obtain the total-weight input.
All 56 front/rear pairs were collected twice using the same inputs, and the displayed results matched. This checks reproducibility; it does not establish suitability for every tire and rim combination. These are calculator estimates, not results from our own riding tests.
The calculator does not accept internal rim width as an input. The chart therefore has not been validated specifically for 30 mm rims.
“Tube” corresponds to the calculator’s Tubed option, which does not separately identify butyl, latex or TPU tubes. The chart also does not provide dedicated recommendations for inserts, radial casings, e-MTBs, smaller wheels, plus tires or fat bikes.
How to Choose Your Starting Pressure
Match your weight and equipment to a reference profile before selecting a pressure. Your riding category helps narrow the choice, but the actual casing, bike weight and conditions also matter.
1. Weigh Yourself With Your Riding Gear
Measure your weight wearing your usual riding clothes, helmet and shoes. Include your pack, tools and the water you expect to carry.
Use that weight to find your chart row. Do not add the bike when selecting the row: its assumed weight is already included in each profile’s calculation.
2. Compare Your Equipment With the Reference Profile
Check your wheel diameter, tire width, casing, setup and bike weight against the assumptions beneath the chart.
For example, an XC bike with protected sidewalls may not match the Thin-casing XC profile. An enduro bike with dedicated downhill casings also differs from the Medium-casing Enduro profile.
If your weight falls between rows or your equipment differs substantially, use the source calculator with your actual inputs. Treating the nearest row as an exact recommendation can hide important differences.
3. Check the Applicable Pressure Limits
Check the current tire and rim guidance, including instructions specific to your tube or tubeless setup. Do not assume that a printed minimum applies differently unless the manufacturer explicitly permits it.
If you need pressure above an equipment limit to prevent repeated bottoming or folding, reassess the tire, casing and wheel setup rather than exceeding that limit.
Worked Example: A 160 lb Trail Rider
A rider weighs 160 lb including riding gear. Their equipment matches the trail reference: a 32 lb bike, 29 × 2.4-inch tires, Medium casing and tubeless setup without inserts.
| Item | Reference Input or Result |
| Rider and riding gear | 160 lb |
| Bike weight | 32 lb |
| Total calculator weight | 192 lb |
| Riding-condition setting | XC/Trail Medium |
| Raw front pressure | 18.2 PSI |
| Raw rear pressure | 20.2 PSI |
| Rounded starting estimate | 18 PSI front / 20 PSI rear |
The rider first checks whether those pressures fall within their equipment’s permitted range. If they do, the rider can assess the setup on a familiar trail at a controlled pace.
Both tires need separate evaluation. A front tire that feels well supported does not establish that the rear tire has enough support for impacts.
Tubes vs. Tubeless: How Pressure Needs Differ
Tubeless tires can often operate at lower pressure because there is no inner tube to pinch between the tire and rim. The tire still needs sufficient pressure and casing support for impacts and cornering.
A tube setup must also protect the inner tube from pinch flats. This is why the chart’s Tubed estimates are higher than its Tubeless estimates for the same profile.
With Tubes: Watch for Pinch Flats
A hard impact can compress the tire against the rim and trap the inner tube. This can leave two nearby holes, commonly called a snakebite puncture.
Pressure is one factor, but tube size, installation and impact severity also matter. Inspect the setup if pinch flats repeat.
With Tubeless: Check Support and Air Retention
Tubeless does not eliminate tire or rim damage. Insufficient support can allow the tire to bottom against the rim or fold in corners.
Air can also escape at the bead during a hard corner or impact, sometimes called burping. Inspect bead seating and compatibility if this occurs; pressure alone may not explain the problem.
Convert to tubeless only when the tire and rim are approved for that setup, using the required installation components.
Avoid a Fixed Tube-to-Tubeless Adjustment
There is no universal PSI reduction for converting to tubeless. Load, tire width, casing and conditions affect the pressure needed.
For the chart’s 160 lb trail reference, the rounded difference is two PSI in each tire. That belongs to this calculation and should not become an instruction to subtract two PSI from every tube setup.
Inserts and special tube materials also need separate guidance. Follow their manufacturers’ instructions alongside the tire and rim requirements.
What Changes Your Mountain Bike Tire Pressure?
The chart keeps several inputs fixed. When your equipment, load or conditions change, your pressure needs can change too.
Rider, Gear and Bike Weight
More load generally requires more pressure when the other setup factors stay the same. A heavier bike or loaded hydration pack can therefore affect the starting estimate.
Weight placement also matters. Rear-mounted luggage may affect the two tires differently.
Tire Width and Rim Compatibility
Wider tires generally allow lower pressures under comparable conditions. Narrower tires may need more pressure to support the same load.
The sidewall marking is not always the actual inflated width. Rim width affects the tire’s dimensions and profile, so check compatibility rather than applying a fixed PSI adjustment for a wider rim.
Tire Casing and Inserts
Lightweight and reinforced casings can behave differently at the same pressure. Their construction affects support during cornering and impacts.
Do not select the Downhill column simply to obtain a lower number. Its Thick-casing assumption is part of the calculation.
Inserts can change support and impact protection, but they do not justify an automatic pressure reduction.
Terrain, Speed and Impact Loads
Lower pressure can help a tire conform to uneven surfaces. Faster corners and heavier impacts, however, can require more support.
Avoid the blanket rule that rougher terrain always needs less pressure. Riding slowly over uneven ground differs from striking sharp rocks at speed.
Wet conditions also do not justify an automatic reduction. Grip, casing support and impact protection must be assessed together.
Wheel Diameter and Temperature
This chart uses 29-inch wheels front and rear. For 27.5-inch, 26-inch or mixed-wheel setups, use a calculator that accepts each wheel’s actual diameter.
Pressure changes with temperature. A tire inflated indoors can have lower pressure after cooling outdoors. The chart assumes equal inflation and riding temperatures.
How to Check Mountain Bike Tire Pressure
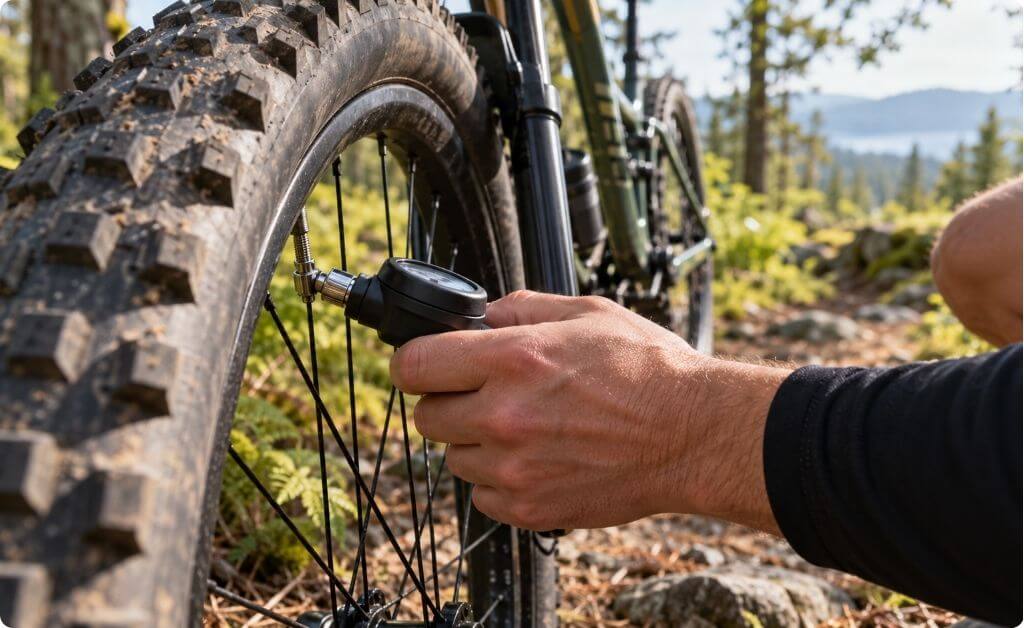
Check both tires before each ride with an accurate gauge suited to low bicycle pressures. Squeezing a tire by hand is not precise enough for repeatable tuning.
Use a Gauge With Clear Low-Pressure Readings
Choose a gauge compatible with your valve and capable of showing small changes. Accuracy matters more than whether the display is digital or analogue.
A high-range gauge with widely spaced markings can make MTB pressure adjustments difficult to judge. Use the same reliable gauge when comparing settings.
Measure and Adjust Both Tires
Follow your gauge or pump-head instructions; valve engagement methods vary.
- Remove the valve cap. For a conventional Presta valve, loosen the small nut at the tip.
- Attach the compatible gauge or pump head securely.
- Read the pressure once the connection is sealed.
- Add or release air as needed, then check again.
- Remove the head, gently close the Presta nut if applicable, and replace the cap.
A brief hiss does not necessarily indicate a leak. Depending on the device, it may come from the pump hose or from the tire. Repeated connections can release enough tire air to affect a low-pressure setting.
Whenever practical, check pressure near your riding temperature. Investigate unusually rapid pressure loss before riding.
How to Fine-Tune MTB Tire Pressure
The goal is a tire that grips well while remaining stable in corners and supported over the impacts you normally encounter.
Record Your Starting Setup
Note the front and rear pressures, tire setup and conditions. Check that the tires are undamaged and correctly installed before testing.
Pressure adjustments cannot correct a damaged tire or an incompatible tire/rim combination.
Ride a Familiar Test Section
Choose a short section with representative corners, small bumps and a predictable surface. Begin at a controlled pace.
Assess harshness, grip, cornering support and impacts. Avoid unfamiliar jumps or difficult descents when testing a lower pressure.
Change One Tire at a Time
A change of about 1 PSI is a practical comparison step when your gauge can resolve it reliably. Keep every adjustment within the applicable pressure limits.
Repeat the same section after changing one tire. Leave the other tire at its previous pressure so you can identify the effect of the adjustment.
Respond to Tire Behavior
If the ride feels harsh or the tire skips across small bumps, a small pressure reduction may help if support remains adequate.
If the tire folds or bottoms against the rim, increase support and inspect for damage. Stop after significant air loss rather than continuing the test.
Suspension settings, tire construction and riding technique can also affect these symptoms.
Save the Setting That Works
Record the pressures that provide a useful balance of grip, comfort and support. Reassess when you change tires, load or riding conditions.
| Test Note | What to Record |
| Starting pressure | Front and rear PSI |
| Adjustment | Which tire changed and by how much |
| Conditions | Surface, moisture and temperature |
| Feedback | Grip, harshness, cornering support and impacts |
| Preferred setting | Final front and rear PSI |
Signs Your Tire Pressure Needs Adjustment
Symptoms are useful clues, but they are not a complete diagnosis.
| Symptom | Possible Explanation | What to Check |
| Harsh ride over small bumps | Pressure may be higher than needed | Pressure and suspension settings |
| Tire skips across uneven ground | Limited compliance or another handling issue | Pressure, tread and suspension |
| Tire folds or feels vague in corners | Insufficient support or unsuitable pairing | Pressure, casing and tire/rim compatibility |
| Tire bottoms against the rim | Insufficient support for the impact | Damage, pressure, casing and impact severity |
| Repeated tube pinch flats | Impact compression or installation issues | Tube condition, installation and pressure |
| Tubeless air loss in corners | Possible burping or a setup fault | Bead seating, compatibility and pressure |
| Unusually fast pressure loss | Leakage through the tube, valve, tape, bead or tire | Locate and repair the leak |
Do not keep lowering pressure if the tire becomes unstable or impacts reach the rim. Likewise, repeated pressure increases may not resolve an unsuitable casing.
After sudden air loss or significant rim contact, inspect the tire, bead and rim before continuing. Repair or replace damaged components before riding again.
Frequently Asked Questions
Is 30 PSI Too High for Mountain Bike Tires?
Not necessarily. Whether 30 PSI is appropriate depends on your weight, tire width, casing and conditions.
It may feel unnecessarily firm for some lighter riders on wide tubeless tires, while other setups need that support. Follow equipment limits and assess handling through controlled testing.
Should Front and Rear MTB Tire Pressure Be the Same?
They do not have to be. The chart’s calculator model gives the rear tire a higher starting pressure.
Your tire sizes, casings and weight distribution may require a different balance. Assess each tire rather than applying a fixed pressure difference.
Can I Use This Chart for 27.5-Inch Tires?
The chart was calculated for 29-inch wheels front and rear. Use a calculator with your actual wheel diameter and setup for 27.5-inch tires.
For a mixed-wheel bike, enter each wheel’s size separately.
Does a 29-Inch Wheel Need a Specific Tire Pressure?
No single pressure applies to every 29-inch MTB tire. Rider load, tire width, casing and conditions also affect the requirement.
Two bikes with 29-inch wheels can need different pressures.
Can I Use These Pressures on an Electric Mountain Bike?
These profiles do not specifically model an e-MTB. Its weight and equipment may differ substantially from the assumptions.
Use your actual inputs and follow the calculator’s instructions for any e-bike setting so additional bike weight is not counted twice.
How Low Can I Run Tubeless MTB Tires?
There is no universal minimum. Follow the applicable manufacturer limits and maintain enough support for your conditions.
A tire that holds air while stationary may still be insufficiently supported during riding. Do not continue reducing pressure if it folds, bottoms or loses air.
Conclusion
Use this mountain bike tire pressure chart to find a starting estimate that closely matches your weight and setup. Follow your equipment’s pressure limits, measure both tires accurately, and make small adjustments on familiar terrain.
Keep the setting that balances grip, comfort and support, then reassess it when your equipment, load or riding conditions change.
