Trailer Lug Nut Torque Chart
Use this trailer lug nut torque chart to find a manufacturer reference for your wheel assembly. The correct setting depends on the wheel, studs and lug nut arrangement. Check the instructions for your installed parts before selecting a value. That matters especially if a wheel or its nuts have been replaced since the trailer left the factory.
Quick Answer: There is no universal torque setting for all trailer wheels. Lippert specifies 90–120 ft-lb for certain 14-, 15- and 16-inch wheels with 1/2-inch studs. Match the complete application below and confirm it against your trailer or wheel manufacturer’s instructions.
Trailer Lug Nut Torque Chart by Manufacturer
All torque figures below are in foot-pounds (ft-lb). Read the application notes with each table. First and second stages are intermediate tightening passes.
Lippert Trailer Wheel Torque Chart
These values come from Lippert’s Component Torque Specifications, revision August 22, 2018, page 2. The table does not identify wheel material or bolt pattern for these rows; those details must be confirmed through the instructions for your assembly.
| Wheel size or application | Stud size | First stage | Second stage | Final torque |
|---|---|---|---|---|
| 14″ | 1/2″ | 20–25 | 50–60 | 90–120 |
| 15″ | 1/2″ | 20–25 | 50–60 | 90–120 |
| 16″ | 1/2″ | 20–25 | 50–60 | 90–120 |
| 16.5″ × 6.75″ | 1/2″ | 20–25 | 50–60 | 90–120 |
| 16″ | 9/16″ | 20–25 | 60–70 | 120–130 |
| 16.5″ × 6.75″ | 9/16″ | 20–25 | 60–70 | 120–130 |
| 16″ dual or 17.5″, cone nut | 5/8″ | 50–60 | 100–120 | 190–210 |
| 16″ dual or 17.5″, flange nut | 5/8″ | 50–60 | 150–200 | 275–325 |
| 17.5″ dual, flange nut | M22 | 50–100 | 250–300 | 450–500 |
This dated reference applies only where your assembly’s instructions support it. The flange-nut rows do not establish a setting for every flange-nut design.
Felling Trailer Wheel Torque Chart
Felling identifies wheel material and nut arrangement alongside final torque.
| Wheel size or application | Material | Stud size | Lug nut arrangement | Final torque |
|---|---|---|---|---|
| 15″ or 16″ | Steel | 1/2″ | Coned nut | 90–120 |
| 16″ | Steel | 9/16″ | Coned nut | 120–140 |
| 16″ dual or 17.5″ single | Steel | 5/8″ | Coned nut with wheel clamp ring | 190–210 |
| 16″ dual or 17.5″ single | Steel | 5/8″ | Non-rotating flange nut | 275–325 |
| 16″ dual or 17.5″ single | Steel | 5/8″ | Rotating flange nut | 150–175 |
| 17.5″ single | Aluminum | 5/8″ | Two-piece lug nut | 140–160 |
| 17.5″ dual, 8-on-275 mm | Steel or aluminum | M22-1.5 | Swivel flange nut | 450–500 |
Identical specifications have been grouped. Felling’s table does not supply tightening stages or lubrication conditions. Check the applicable installation instructions for those details.
Dexter Historical Steel-Wheel Torque Chart
Dexter’s service manual limits this chart to Dexter steel wheels manufactured before June 2004. A Dexter axle alone does not establish that it applies.
All rows below specify 60° cone nuts. Bolt-circle dimensions are in inches.
| Wheel size | Bolt pattern | Stud thread | First stage | Second stage | Final torque |
|---|---|---|---|---|---|
| 12″ or 13″ | 4-on-4 or 5-on-4.5 | 1/2″-20 | 20–25 | 35–40 | 60–75 |
| 14″ | 5-on-4.5 | 1/2″-20 | 20–25 | 50–60 | 100–120 |
| 15″ | 5-on-4.5 or 6-on-5.5 | 1/2″-20 | 20–25 | 50–60 | 100–120 |
| 16″ or 16.5″ | 6-on-5.5 | 1/2″-20 | 20–25 | 50–60 | 100–120 |
| 16″ or 16.5″ | 8-on-6.5 | 9/16″-18 | 20–25 | 50–60 | 140–170 |
For wheels from another manufacturer, obtain the applicable specification. Dexter’s separate maximum stud torque figures are upper limits, not installation targets.
How to Find the Correct Torque for Your Trailer
Start with the owner’s manual and the wheel manufacturer’s installation instructions. If the wheels have been replaced, identify the replacement parts before relying on the original specification.
- Identify the wheel. Record its size, material, manufacturer and part number where available.
- Identify the studs. Confirm their diameter and thread specification. The socket size that fits a lug nut does not tell you the stud diameter.
- Identify the nut and mounting arrangement. Check the seat shape and whether the assembly uses a clamp ring, fixed flange or rotating flange.
- Match the complete application. Confirm the final torque, tightening stages, thread preparation and recheck schedule.
The Felling chart’s three 5/8-inch steel-wheel arrangements illustrate why nut identification matters: each has a different torque range. If the installed parts cannot be identified, provide the manufacturer with the trailer model or VIN, wheel markings and clear hardware photographs.
If you only know the outside socket size, our trailer lug nut size chart explains how to check stud diameter, thread pitch and the seating surface. A nut may thread onto the stud yet have the wrong seat for the wheel.
Wheel size and tire size answer different questions. For example, the “15” in a trailer tire marked ST205/75R15 identifies the rim diameter, but it does not identify the wheel’s stud size, nut design or torque. Our trailer tire size chart covers tire sizing; use the wheel assembly’s documentation for the fastener specification.
Worked Examples: Select the Row Before the Torque
Example 1: Lippert wheel with 1/2-inch studs. Suppose your trailer’s applicable Lippert instructions confirm a 15-inch wheel and 1/2-inch studs. Lippert’s row calls for 20–25 ft-lb in the first stage, 50–60 ft-lb in the second, and a final range of 90–120 ft-lb. Confirm that the instructions cover your actual wheel before using that sequence. Do not infer the wheel material or bolt pattern from the Lippert table; it does not list them.
Example 2: A Felling wheel with 5/8-inch studs. Suppose the identified Felling application is a 17.5-inch single steel wheel. Stud size alone leaves three rows in the Felling table. Identify whether the assembly uses a coned nut with clamp ring, a non-rotating flange nut or a rotating flange nut, then use the matching row and its applicable installation instructions.
Example 3: A replacement wheel on a Dexter axle. An axle label reading Dexter does not establish the manufacturer or age of the installed wheel. Dexter’s historical steel-wheel table has a limited scope. For a replacement wheel, obtain that wheel’s specification and make sure the axle stud’s maximum is not exceeded.
These examples show how to locate a published range. When a manufacturer gives a range rather than a single setting, follow any more specific target in your trailer or wheel instructions; do not combine ranges from different tables.
Does Lug Count Determine Torque?
Five, six or eight lugs help identify the wheel’s bolt pattern, but lug count alone does not establish torque. In the historical Dexter chart, the 15-inch five-lug and six-lug applications share the same specification. Use the complete row and its stated scope. If you need to measure or decode the mounting pattern, see our trailer wheel bolt pattern chart.
How to Tighten Trailer Lug Nuts
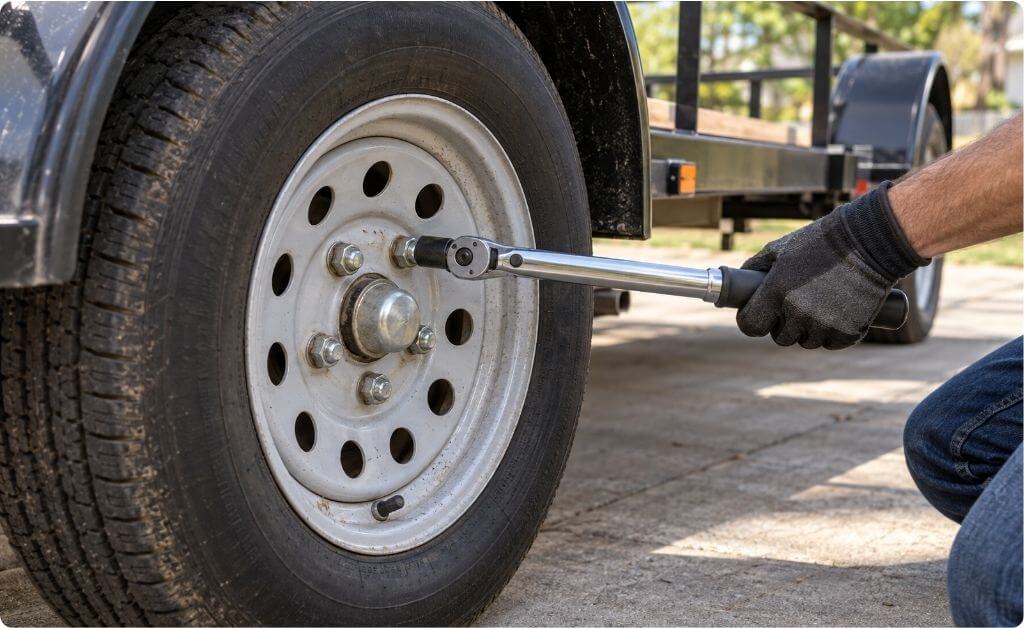
Use a torque wrench and the installation procedure for your exact assembly. Dexter’s Wheel Attachment and Torque Requirements bulletin, dated October 14, 2019, describes this sequence:
- Confirm the fit. Use nuts matched to the wheel’s seat and ensure the wheel sits properly against the hub. Dexter also calls for checking the bolt circle, hub pilot, mounting face and stud engagement when selecting a replacement wheel.
- Start each nut by hand to help prevent cross-threading.
- Snug in the specified cross pattern. Dexter’s bulletin specifies an initial 10 ft-lb seating pass.
- Complete the tightening stages. Follow the applicable chart and repeat the specified pattern at each stage, finishing at the required torque with a torque wrench. An impact wrench alone does not verify the final setting.
Use your assembly’s instructions for thread preparation and lubrication. Do not transfer a special installation instruction from one hardware arrangement to another.
When to Recheck Trailer Lug Nut Torque
Dexter’s bulletin calls for torque checks before first road use, after each wheel removal, and after the first 10, 25 and 50 miles, with periodic checks afterward. Follow the applicable trailer and wheel instructions if they prescribe a different schedule.
Keep the applicable specification with the trailer so it is available after a roadside tire change. The torque schedule is separate from tire inflation: use our trailer tire PSI chart for the tire pressure check before a trip.
If a nut repeatedly loosens or mounting parts appear damaged, have the assembly inspected before towing. Repeated movement can indicate an issue that another tightening pass will not resolve.
Frequently Asked Questions
Do aluminum trailer wheels need a different torque?
They may. Confirm the wheel model and its required studs and nuts. Wheel material alone does not establish a torque value; use the manufacturer’s specification for the complete assembly.
Should trailer lug nut threads be dry or lubricated?
Follow the application-specific instructions. Dexter’s bulletin expressly specifies greased threads for one 17.5-inch hub-piloted arrangement with a clamp ring and 90° cone nuts. That instruction does not automatically apply to other wheels.
What if two torque charts give different numbers?
Check their manufacturer, application, revision and hardware details. Do not average the figures or combine their ranges. If the instructions for your actual parts appear to conflict, have the trailer or wheel manufacturer resolve the specification before installation.
Sources and Verification Method
The tables retain the manufacturers’ published ranges. Identical rows were grouped, and Dexter’s abbreviated bolt-circle labels were expanded for readability. Missing material, thread-pitch and installation details were not inferred. The installation guidance is attributed separately to Dexter’s 2019 bulletin.
Conclusion
Identify the wheel and mounting hardware, confirm the applicable manufacturer specification, then follow its tightening sequence and recheck schedule. Keep those details with your trailer records for the next tire change or wheel service.
